
|
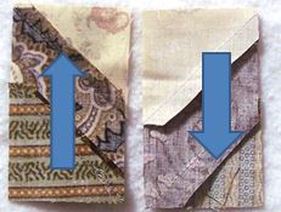
I am pleased to report that all my V Blocks from part 1 are done of the mystery offered by Bonnie Hunter on her blog. 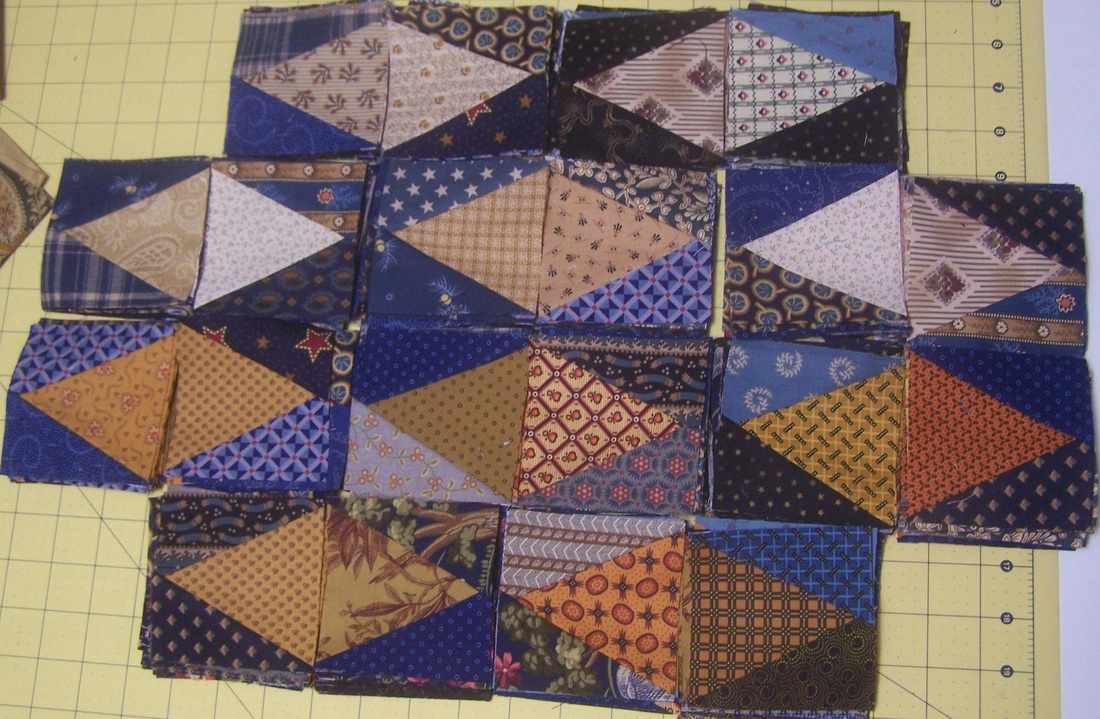
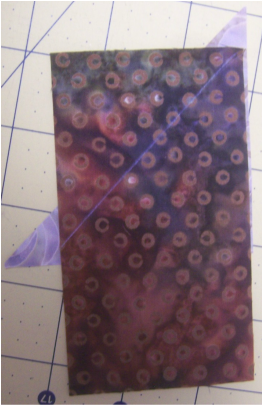
Celtic Solstice Step 1
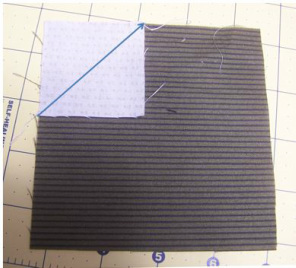
On to Step 2. Since I am a tool fanatic, I am using a recently found ruler called the Perfect Corner Ruler for these units. It is built off the Folded Corner concept. However the variation on the technique gets rid of some of the challenges with the folded corners. The Perfect Corner Method™ and Ruler™ were both developed by Ruthanna Grihalva, Forever In Stitches, LLC. You can actually do this technique without the ruler -- but I love the ruler. 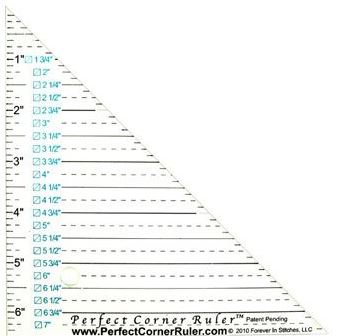
Perfect Corner Ruler
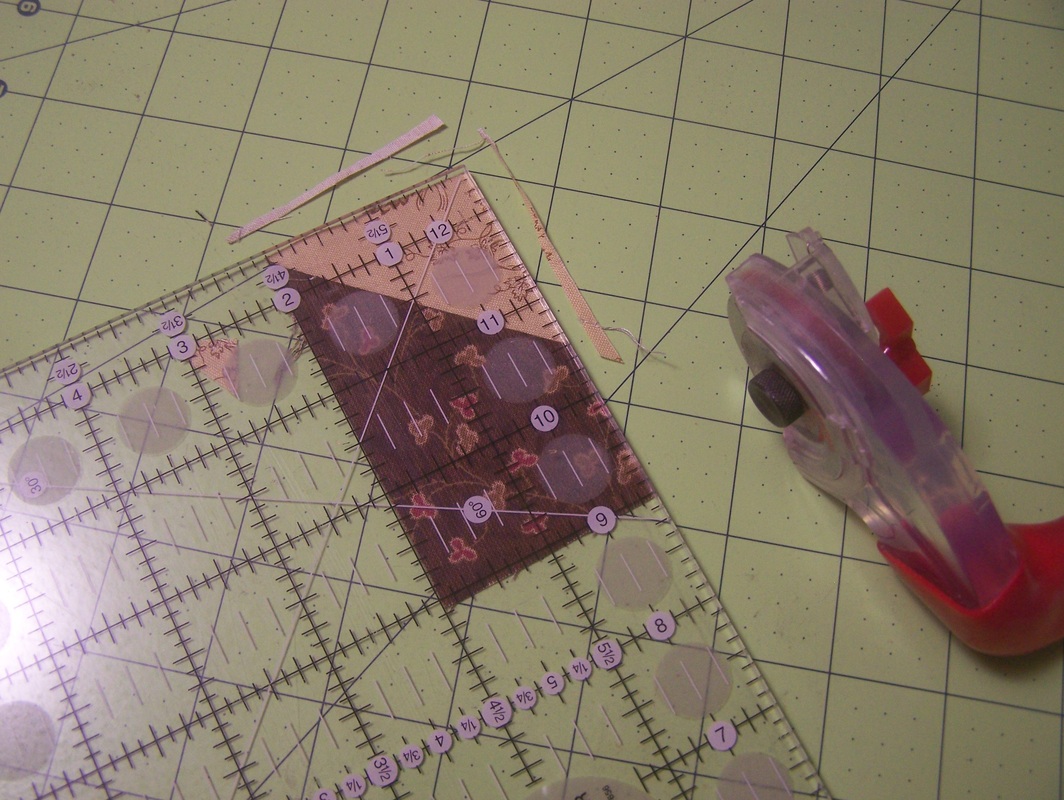
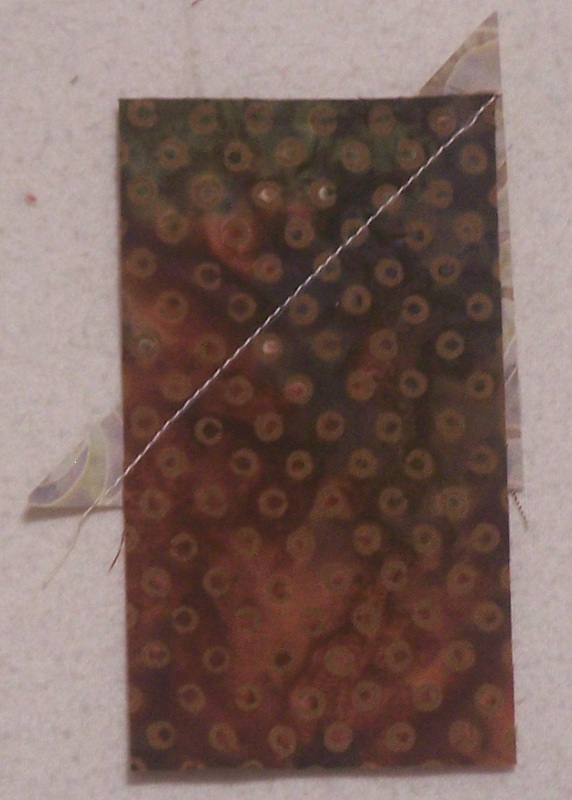
How to Use the Perfect Corner Ruler Using the ruler, draw a diagonal line on the wrong side of the 2" x 3-1/2" piece of fabric. The measurement to use for this line is exactly the same as your folded corner measurement. It just goes on the base piece instead of the folded corner piece. 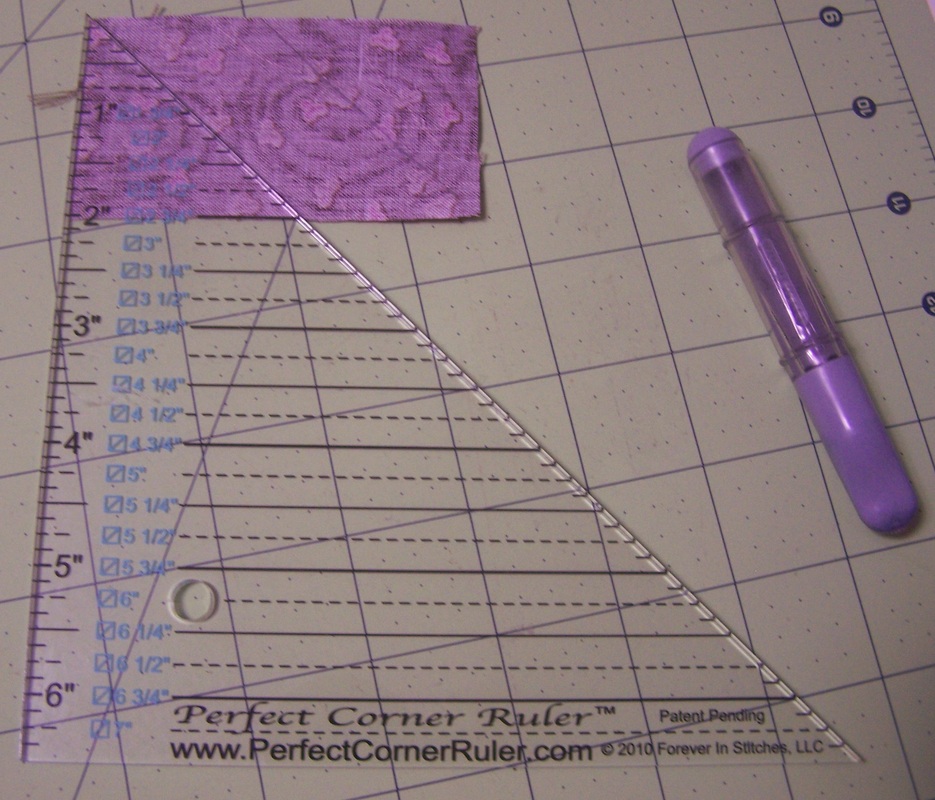
Cut corners. The square these corners are cut from will be 3/4" greater than the drawn line square. So for the chevron units they will be cut 2-3/4" x 2-3/4". I will need half as many squares as called for in the instructions from Bonnie Hunter for this technique. 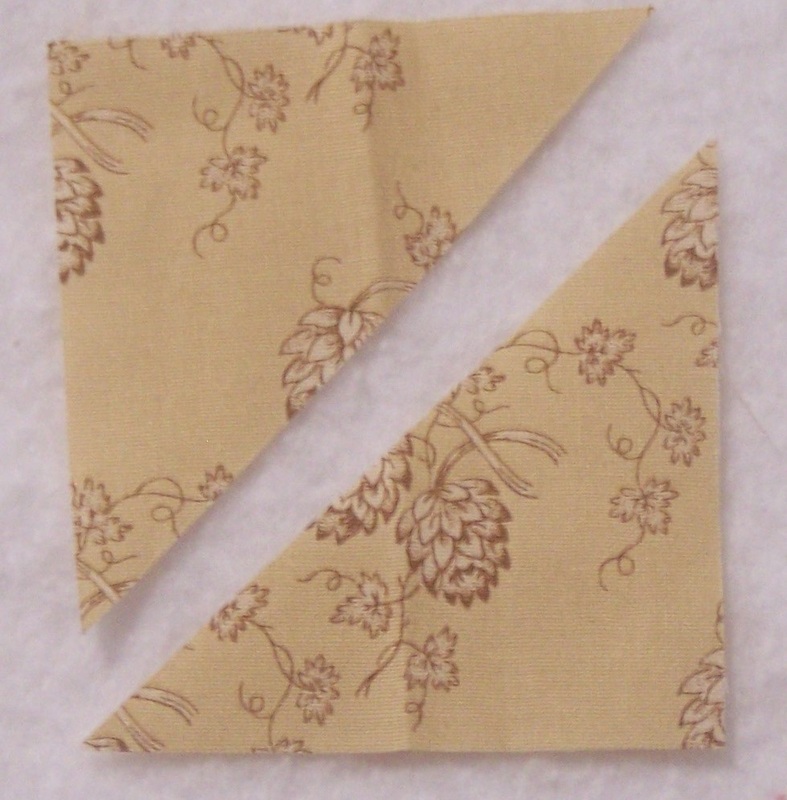
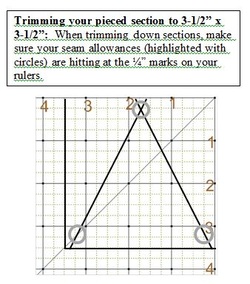
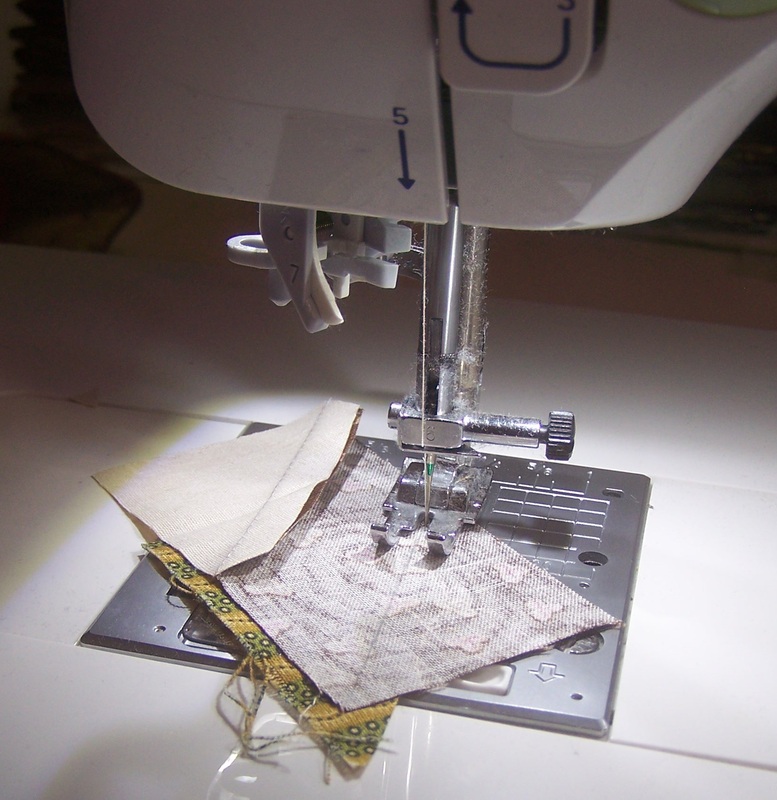
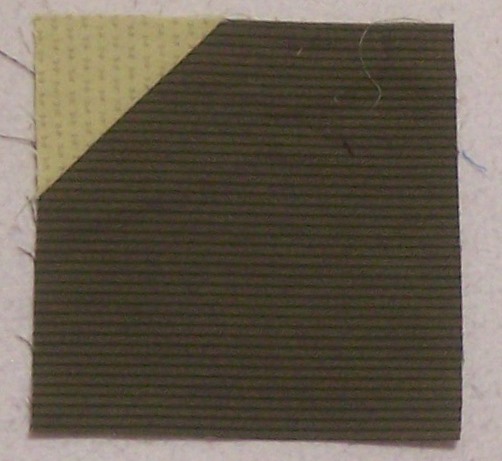
Place one of the Corner Triangles underneath the Base unit (right sides together). You will want to make sure that about 1/4" of Corner Triangle extends beyond the sewing line. The sew directly on the line. 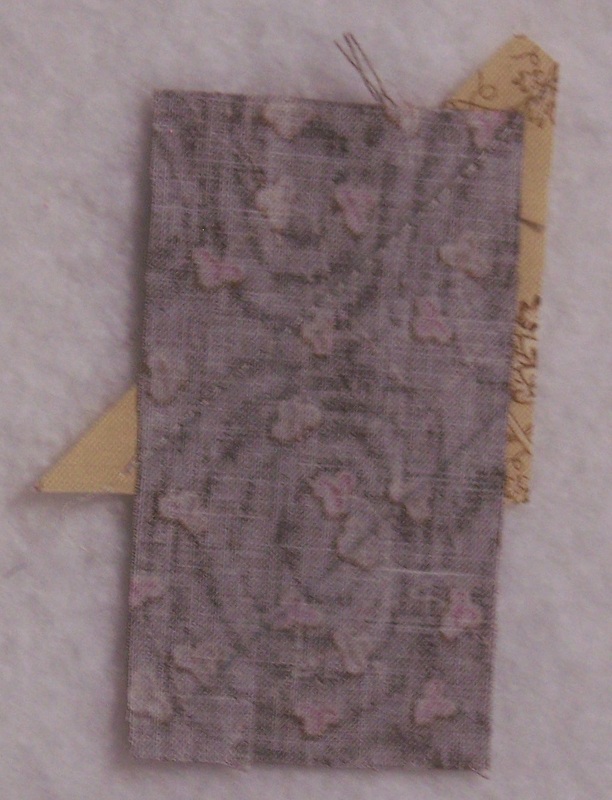
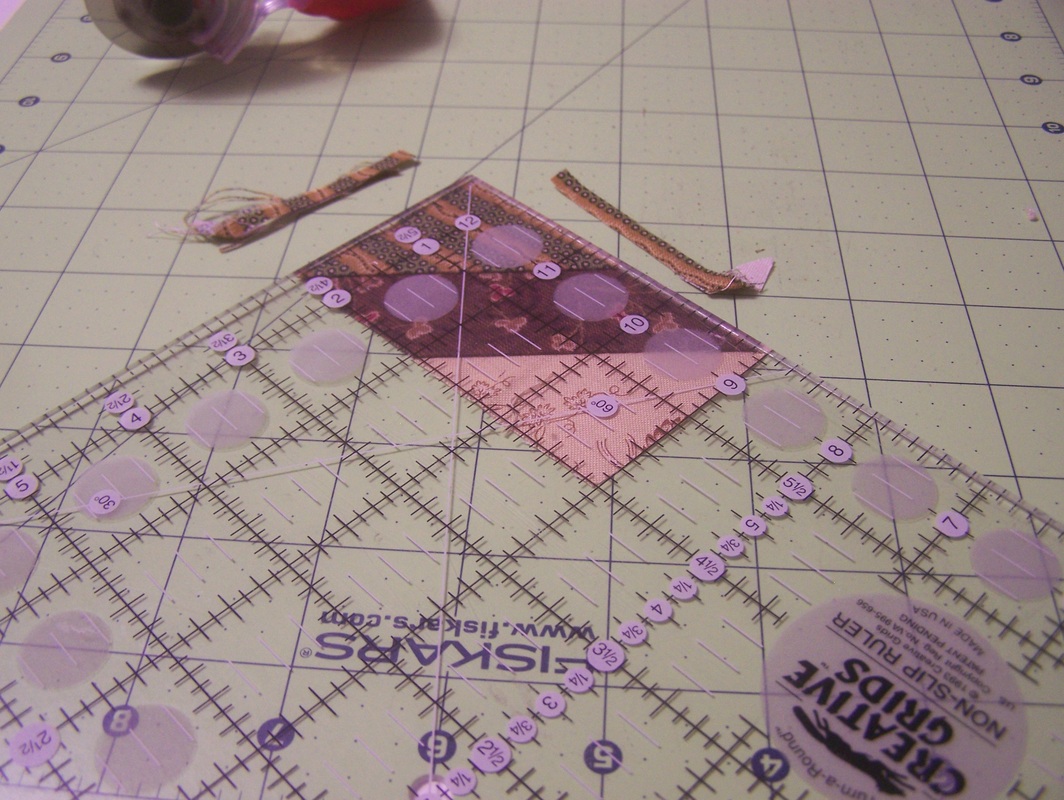
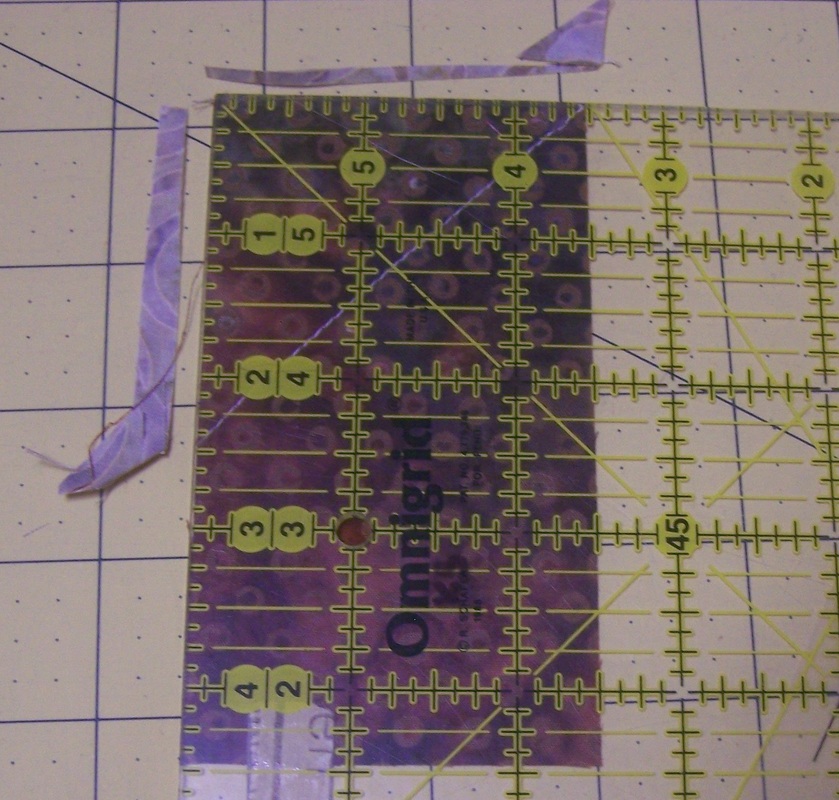
Fold the Corner Triangle into position. An added benefit is that the seam allowance can be pressed either away from or towards the corner. Here is the MAGIC! Align a square ruler to the original size of the Base Unit and trim off the excess Corner Triangle fabric. Finish by folding the Corner Triangle down out of the way and trimming the excess base unit fabric.
Do the other half of the chevron facing the opposite direction.
One other item I chose to do was to do a split seam (rather than pressing them open). If you are uncertain how to do this, check out my You Tube Video on the topic. It reduces bulk, but is much easier to do. Hopefully I won't regret this with the next set of instructions. 
Finished Chevron from Back with Split Seam
Finished Chevron from Front
One down. 99 to go.
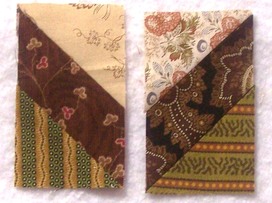
Happy quilting. Kari Schell On Point Quilter I am a Bonnie Hunter fan. Why? She does an incredible job with scrap quilts. She has some great tips in organizing your scraps. She is generous in sharing her knowledge/patterns. When one of my friends mentioned she had a mystery starting in late November -- I was intrigued. When I saw it was using V Blocks I was hooked and decided I needed to make it. The V Block is one of my favorite quilting units as it can give the illusion of curves with straight piecing. Information on the Celtic Solstice Mystery are here. Here are also the blog posts regarding Clue 1. I've started on Clue #1 - which are the V Blocks. 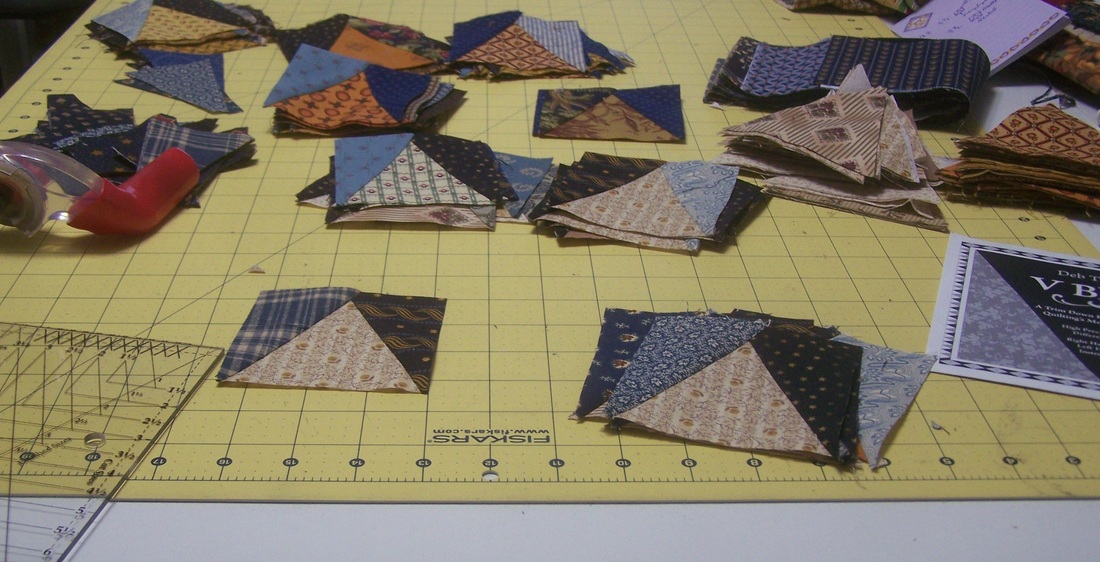
V Blocks Work in Process
Bonnie provided a number of different suggestions of how to piece these units. I choose to go a different route and use a different specialty ruler the V Block Trimmer ™ from Deb Tucker's Studio 180 Design. I've have enjoyed using the recommended Tri-Recs rulers in the past. In fact I think I was probably one of the first purchasers of the rulers. I was taking a class from Joy Hoffman in Fargo and she was offering a class that used her newly produced tool. They didn't even have the packaging available -- so I purchased it in a zip-lock bag. Instructions for using Tri-Recs are available with the Clue 1 instructions from Bonnie Hunter. I used TriRecs for many years and loved cutting the units with the tool. One thing I struggled with was stretching during the piecing process. Not a fault of the tool -- but a reality of my own construction process. A few years ago, a vendor at the MN Quilt Show was demonstrating a new group of rulers by Deb Tucker's Studio 180 Design. Their rulers are based on the concept of oversized cutting with trim-downs of the finished units to the correct size. One of their rulers was designed for the V Blocks. 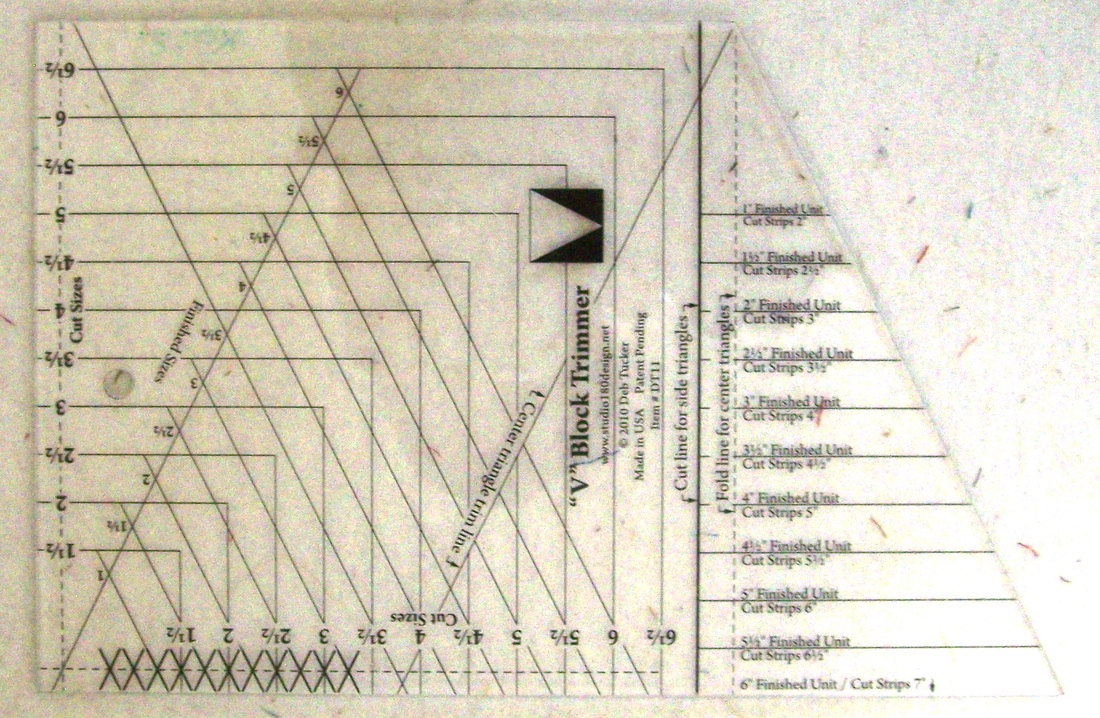
V Block Trimmer by Studio 180 Design
The ruler has the same angles as Tri-Recs. But also has lines for cutting down oversized units. For these 3-1/2" units (3" finished), I started with 4" strips. 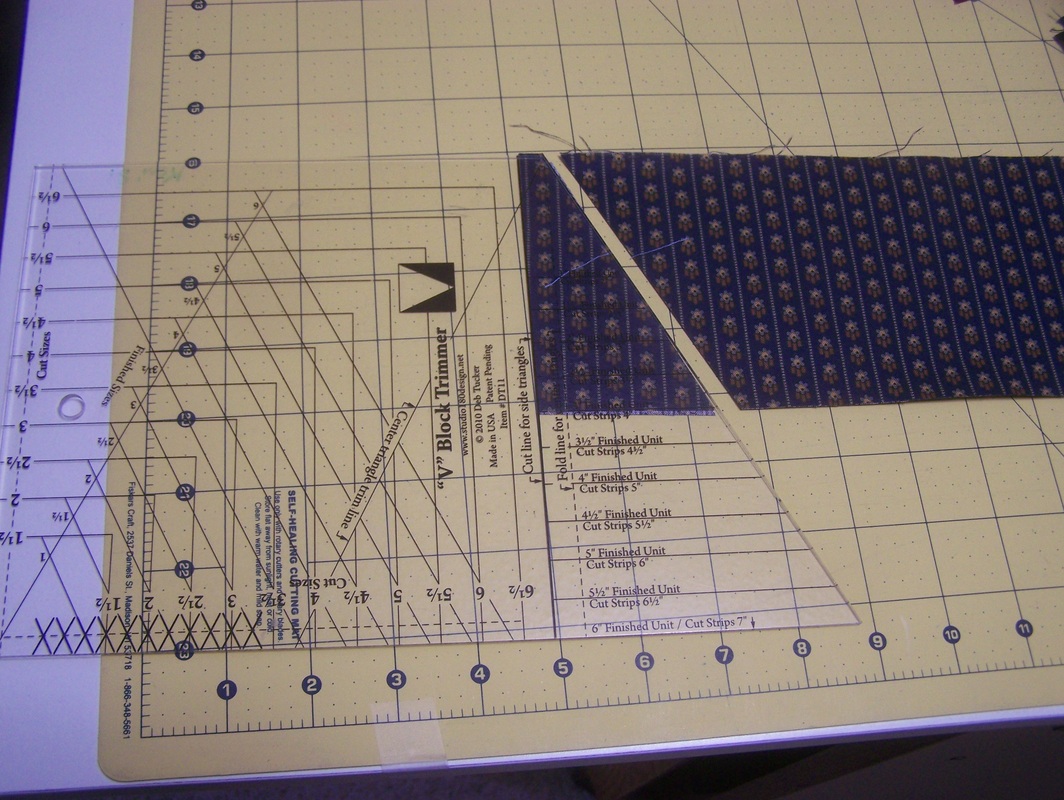
Once I sewed the long sides together, I use the ruler for trimming the units to 3-1/2" x 3-1/2". I've marked the "measurement lines" on the photo with red so you can see what I am matching up. It guarantees me an accurate 1/4" seam at all intersections. 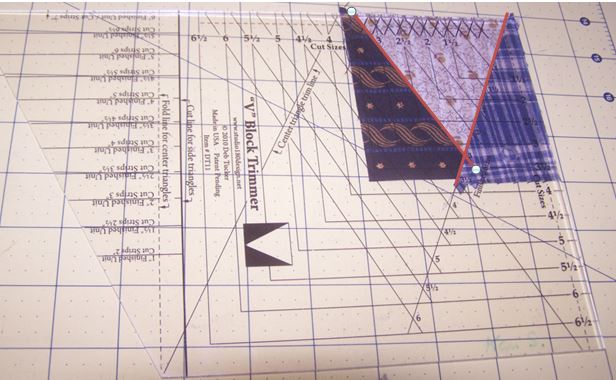
Centering Lines for First Trim. Trim top and right sides.
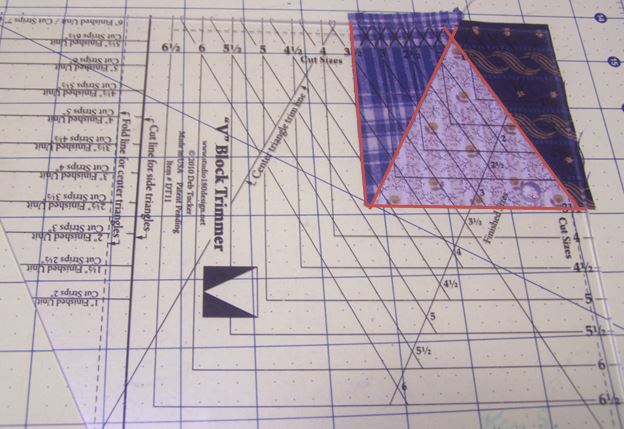
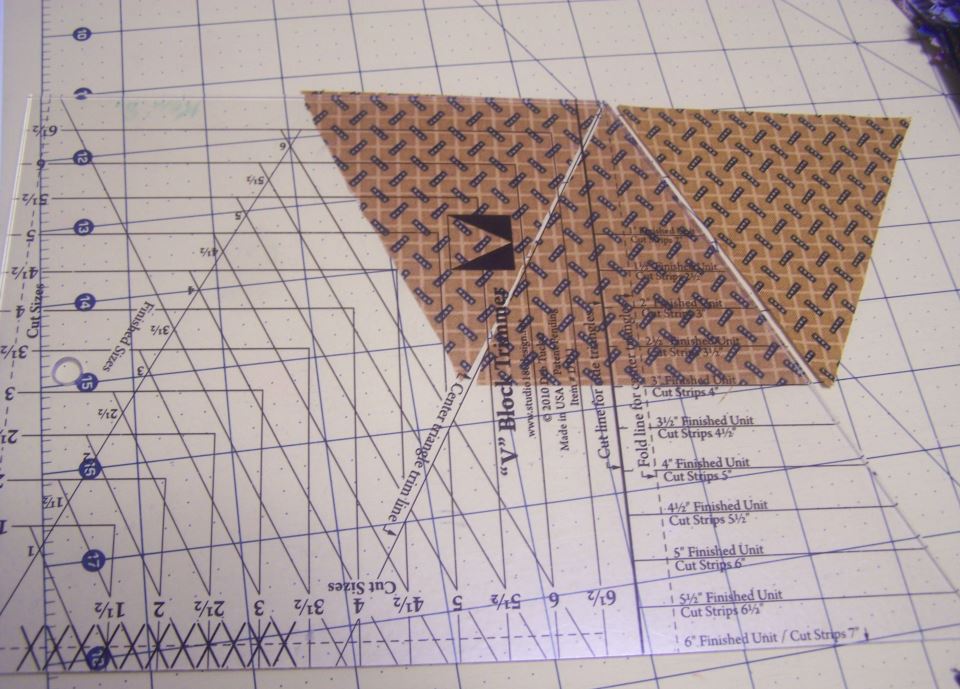
Rotate block under ruler. See new centering Lines for Second Trim. Trim top and right sides.
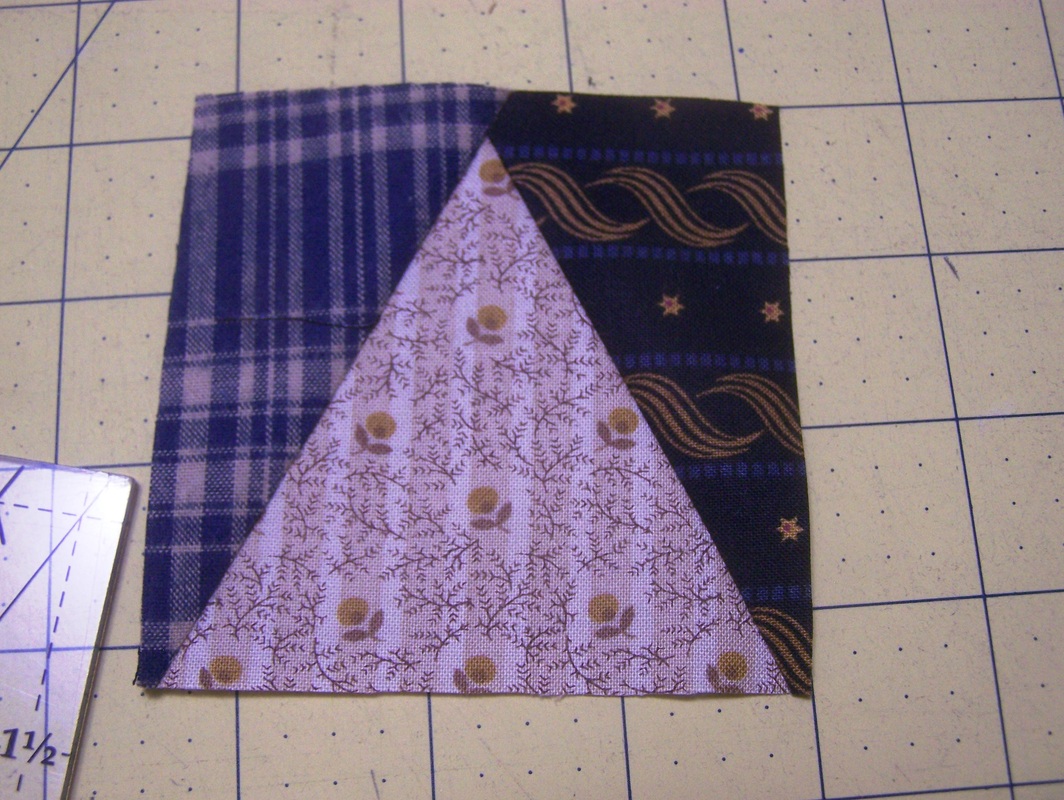
Finished unit now measuring exactly 3-1/2" x 3-1/2".
In my pattern "It's a Mystery", I figured out the cutting angle for the these oversized units if you don't have the tool (along with instructions for those who wish to use the V Block Trimmer). You will want to start with 4" strips. There is no need for using the following charts if you have the Tucker Trimmer or TriRecs. 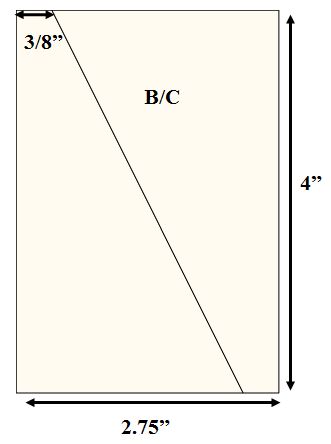
Optional Rotary Cutting without Specialty Rulers
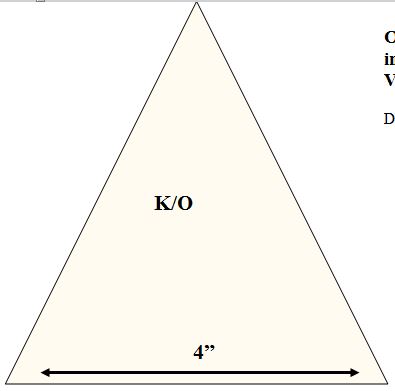
Optional Rotary Cutting without Specialty Rulers
 To do the trim-down without the Tucker Trimmer, I suggest marking the seam allowances on another ruler with a sharpie marker on InvisiGrip put on the ruler. I will admit that I prefer using the various specialty rulers as I think it makes me a more accurate piecer.
Happy quilting. Kari Schell On Point Quilter I was going to label this post -- are you a cheater? Then remembering this is the internet and thought I needed to tone it down a bit. Back when I started quilting, I had a book from Mary Ellen Hopkins entitled "It's OK if you Sit on My Quilt Book". In this book she introduced the quilting world to connector corners. I think this may have been one of the techniques that revolutionized modern day quilting. Over the years I have heard a number of names for the technique including "cheater corner" and "folded corner". The technique refers to a method of adding triangles to a quilt block. It is frequently the suggested method for creating snowball blocks, square within a square units and flying geese units. Although I've used the technique over the years, I found that I would have some fabric slippage or I would stretch the fabric in the pressing process -- resulting in less than perfect results.
A couple of months ago my friend Karen S. introduced me to the Perfect Corner Ruler™. It is built off the Folded Corner concept. However the variation on the technique gets rid of some of the challenges with the folded corners. The Perfect Corner Method™ and Ruler™ were both developed by Ruthanna Grihalva, Forever In Stitches, LLC. 
How to Use the Perfect Corner RulerUsing the ruler, draw a diagonal line on the wrong side of the base piece of fabric (this is the piece the corner will be added to). The measurement to use for this line is exactly the same as your folded corner measurement. 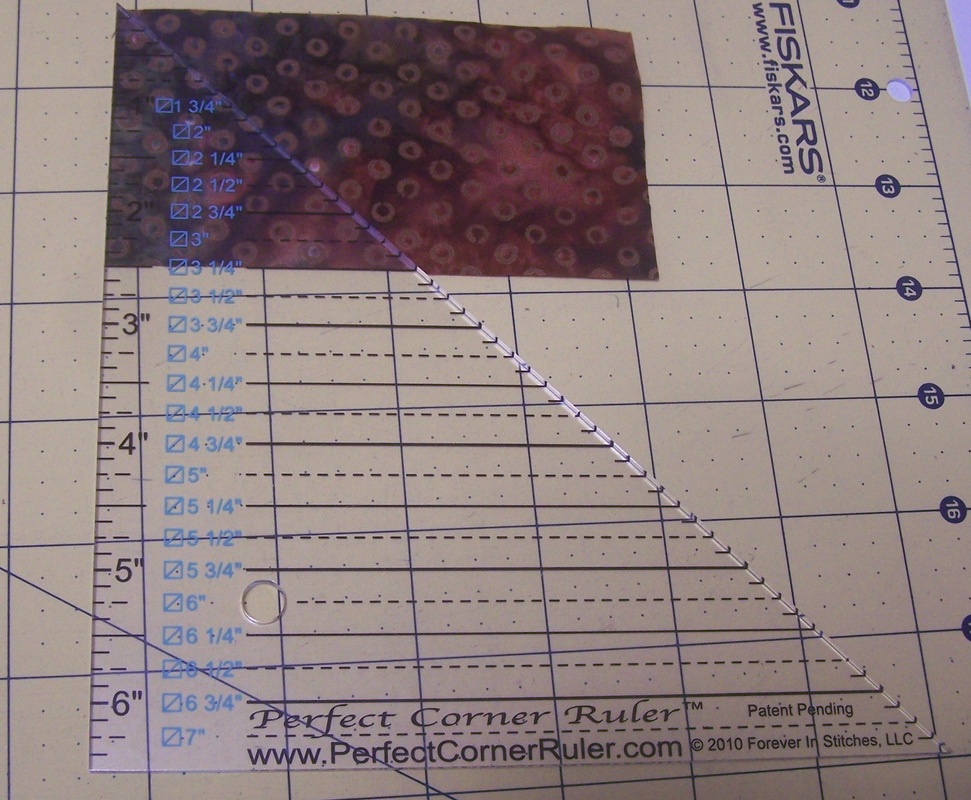
Perfect Corner Ruler Used to Draw Lines
Cut corners. The square these corners are cut from will be 3/4" greater than the drawn line square. (The ruler will tell you what that measurement is. And when I incorporate these instructions in a pattern I do the same.) 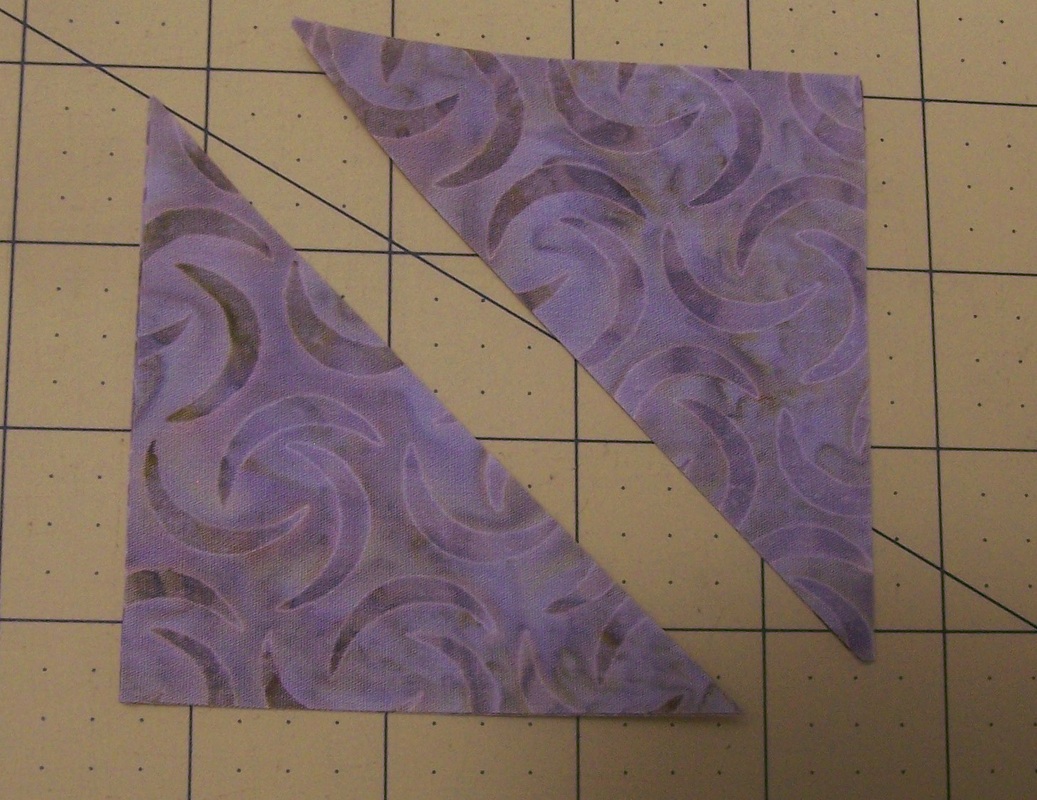
Place one of the Corner Triangles underneath the Base unit (right sides together). You will want to make sure that about 1/4" of Corner Triangle extends beyond the sewing line. The sew directly on the line.
Fold the Corner Triangle into position. An added benefit is that the seam allowance can be pressed either away from or towards the corner. 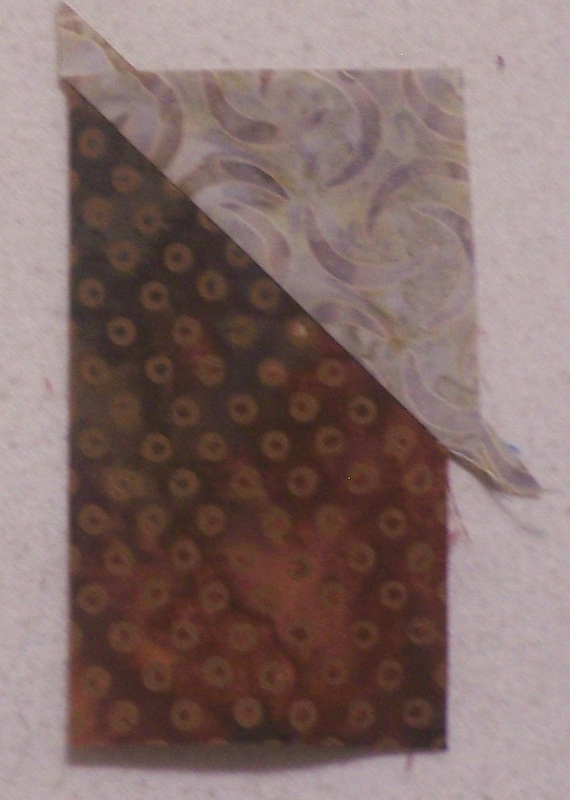
Unit with Perfect Corner after Pressing
Here is the MAGIC! Align a square ruler to the original size of the Base Unit and trim off the excess Corner Triangle fabric. Finish by folding the Corner Triangle down out of the way and trimming the excess base unit fabric.
I have found that I am more accurate when I use this technique. It can be done without the "official" ruler -- but I can't resist adding another tool to my quilting supplies. And I think the ruler makes the process go a little bit faster. I've incorporated the technique in my latest pattern - Theodore, Ted and Tad Bowties. Take a look if you are interested in a fun "guy quilt". 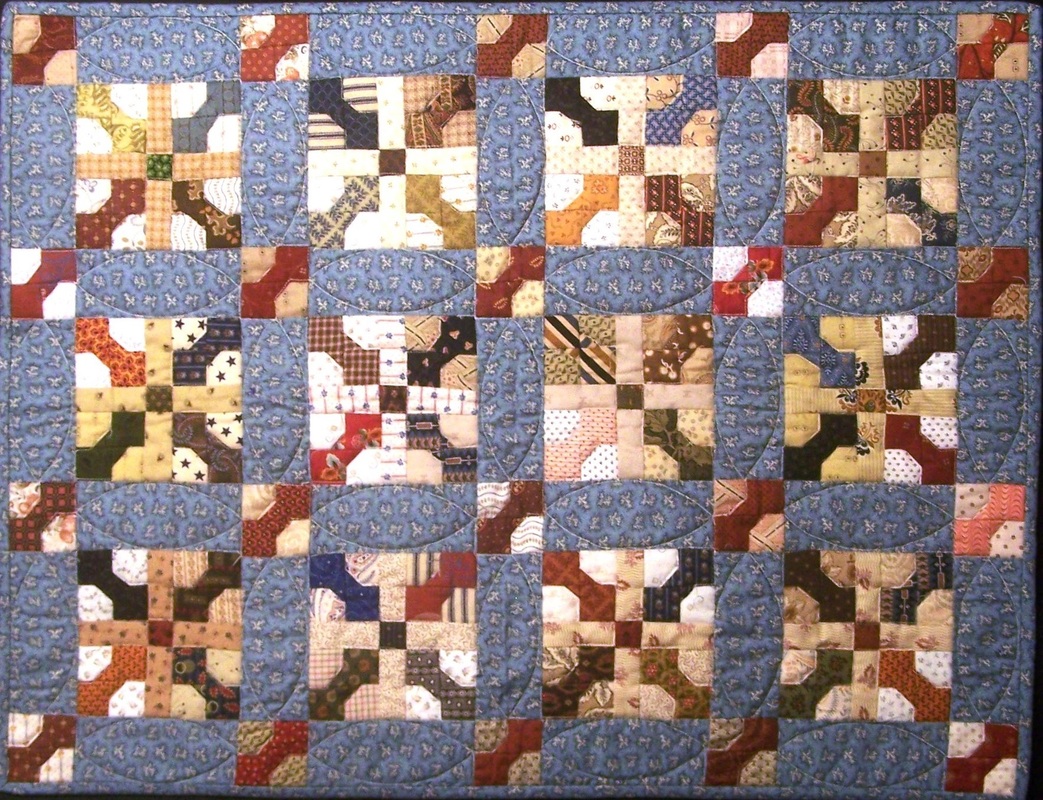
Theodore, Tad and Ted Bowties - Miniature Version
On Point Quilter Goes SocialI officially launched my Facebook page this week. To celebrate I will be doing a drawing for all my Facebook fans. The winner will receive copies of my two latest quilt patterns (It’s a Mystery and Theodore, Ted and Tad Bowties) along with the Perfect Corner ruler which can be used in the bowtie quilt. Like my page by November 17th to be eligible. 
Facebook Giveaway
Happy Quilting.
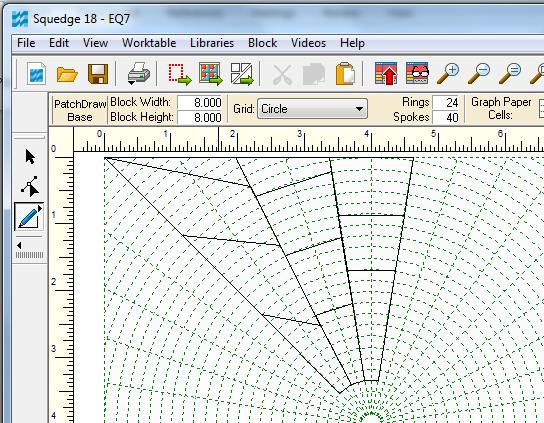
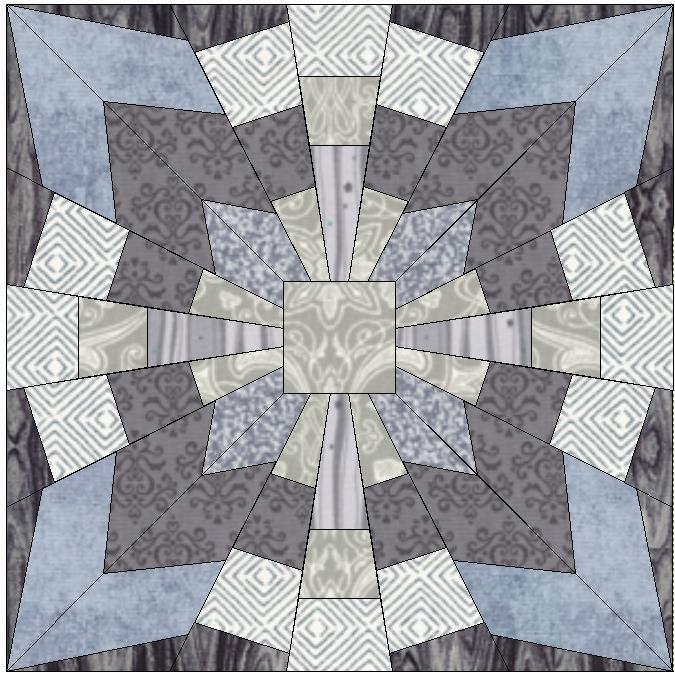
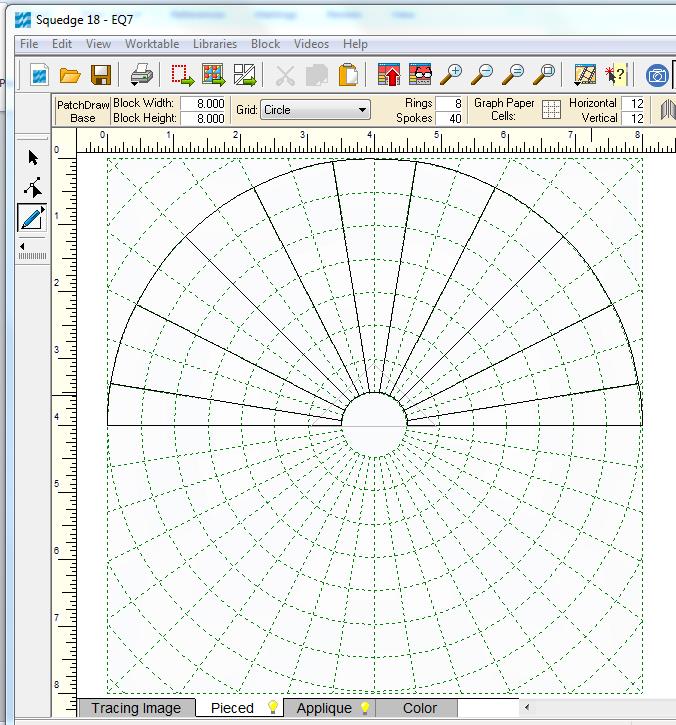
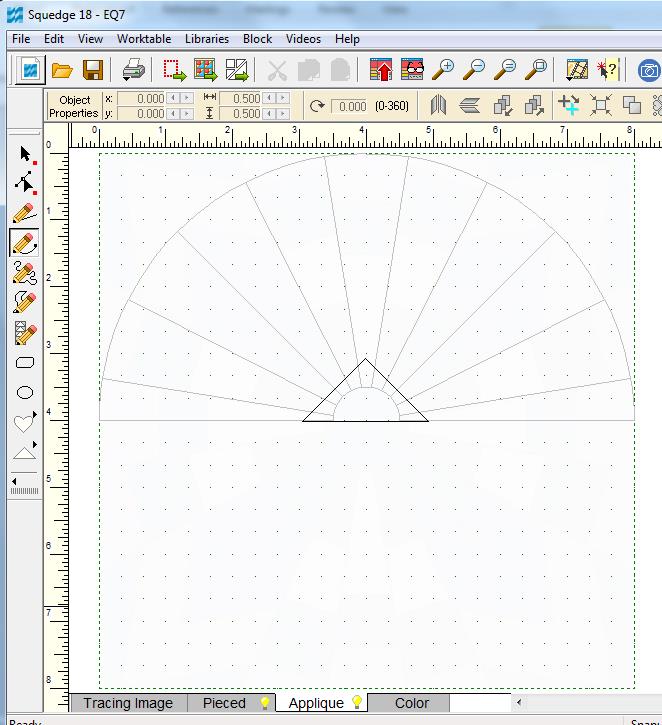
I love quilting tools and gadgets. Particularly all the fun rulers. I was at the Noble Quilter in Elk River MN a few weeks ago and saw a large table runner made from a new ruler called the Squedge 18 by Phillips Fiber Art www.phillipsfiberart.com . So what's a Squedge? Simply it is a Squared Wedge! When I got home I realized the table runner was going to get really big (23 x 68) and too large or my dining room table. So after reviewing a few other options I decided on one block surrounded by four circular half blocks. The instructions for the center block were included with the Squedge 18 ruler. Here is my finished Squedge 18 quilt. The whole thing went together in a day and I was able to use fabric from my stash.  I also decided to draft this quilt in Electric Quilt 7 (EQ7), so I could play with different color options. Here are a few suggestions if you wish to try this as well. This block was drafted in Patchdraw. I used the following settings in Electric Quilt Pieced Tab: Grid: Circle Rings: 24 Spokes: 20 Turn off the graph paper cells. 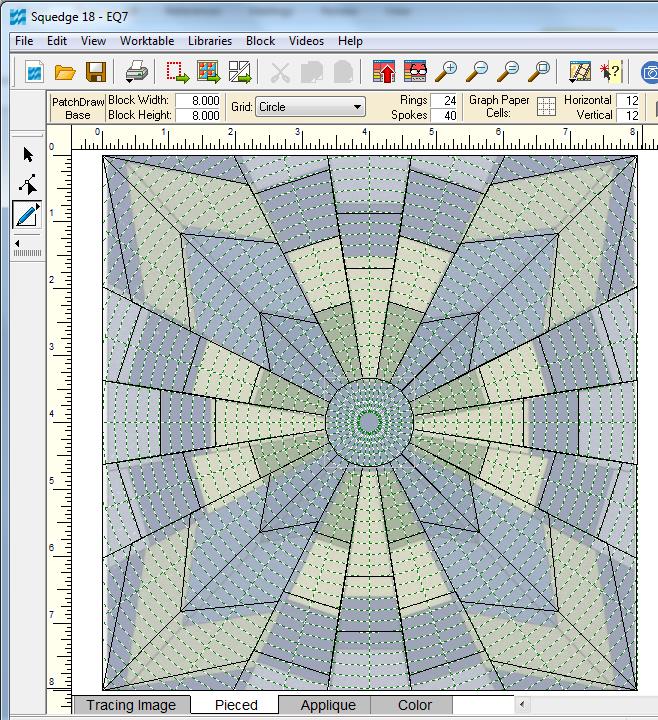 Draft one wedge strip at a time and use the clone and flip buttons to finish the pieced section. The first drawing shows the three wedge strips that need to be drafted. The second shows them all cloned, flipped and put in place.
Then draw the center square in the applique section.
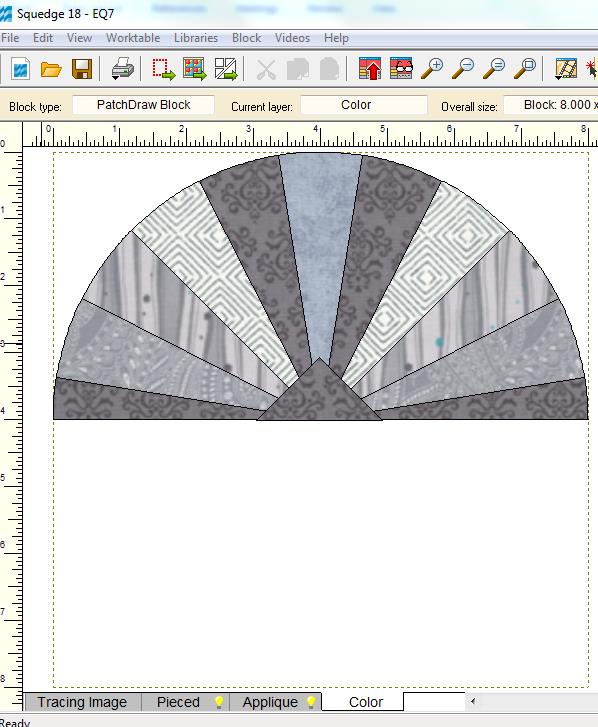
The half circle blocks were also done in Patchdraw. For this one you want to use the PolyArc pencil rather than the PolyDraw. This will give you the curved lines for your outside edges of your block.
 To do the actual quilt in Electric Quilt, use Custom Set. The Layout should be 32 x 32. Make sure Snap to Grid is turned on. Bring in the blocks and resize to 16”. Now you can play with coloring. Here is a version I drafted in using the Grays fabric library from Electric Quilt. (This is their free fabric download from March 2013). 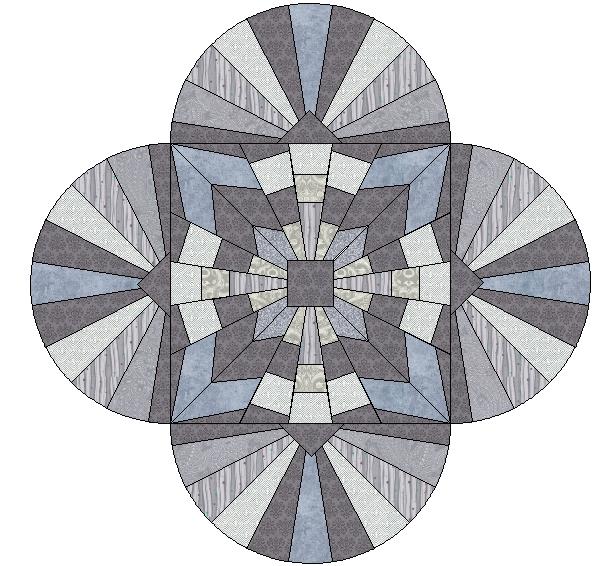 |


Free guide available for newsletter subscribers


Kari SchellElectric Quilt Expert and Educator and Pattern Designer. Categories
All
Archives
May 2024
|


 RSS Feed